Looking for a cozy and trendy accessory to keep you warm this winter? Look no further than knitting machine headband patterns!
With just a few simple steps, you can create a stylish headband that will not only keep your ears cozy but also make a fashion statement.
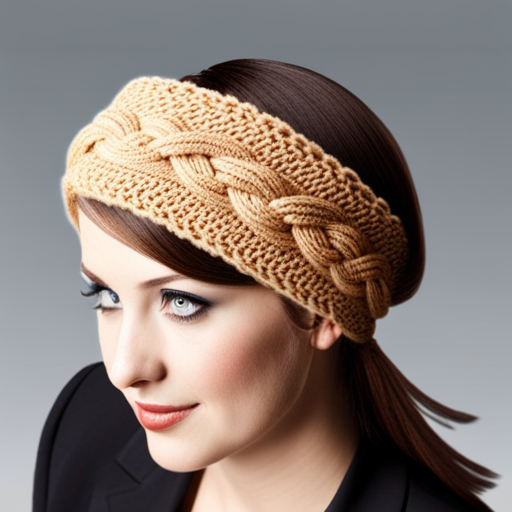
First, choose your favorite yarn and needles to match your personal style. Then, select a headband pattern that suits your taste – whether it’s a classic cable design or a modern twist on the traditional knit.
Once you have everything ready, set up your knitting machine and get started! With the ease of using a knitting machine, you’ll be amazed at how quickly your headband takes shape.
Finally, finish off your creation by adding any desired embellishments or styling touches.
So why wait? Get ready to rock the coziest and trendiest headbands with these knitting machine patterns!
Key Takeaways
- Knitting machine headbands are cozy and trendy winter accessories.
- Different headband patterns cater to different skill levels and styles.
- Choosing the right yarn and needles is crucial for knitting machine accessories.
- Personalize headbands with embellishments for added style.
Choose Your Yarn and Needles
Let’s talk about how to choose the perfect yarn and needles for your knitting machine headband! When it comes to choosing knitting machine accessories, it’s crucial to select the right yarn and needles.
First, consider the type of yarn you want to work with. Do you prefer a cozy wool blend or a lightweight cotton? Explore different knitting machine techniques and experiment with various types of yarn to find what works best for you.
Next, think about the needle size that will give you the desired result. Thicker needles create a looser stitch, while smaller ones produce a tighter knit. Consider the pattern you’ll be using and how it will affect your choice of needle size.
By carefully selecting your yarn and needles, you can create trendy and fashionable headbands that are both cozy and stylish.
Select a Headband Pattern
Get ready to create a stylish accessory that’ll keep you warm and make a fashion statement. Now that you’ve chosen your yarn and needles, it’s time to select a headband pattern.
There are various patterns available that cater to different knitting skill levels and styles. Whether you prefer a simple ribbed design or an intricate cable pattern, there’s something for everyone.
When choosing a headband pattern, consider the materials you have at hand and the level of difficulty you’re comfortable with. Some patterns may require specific types of yarn or stitches that might be more challenging for beginners. If you’re new to knitting, opt for simpler patterns that use basic techniques like knit and purl stitches.
Explore different headband patterns online or in knitting books to find one that matches your style and skill level. Remember, the goal is to create a cozy and trendy accessory that reflects your personal taste while keeping your ears warm during those chilly days ahead!
Set Up Your Knitting Machine
Once you have everything prepared, it’s time to start setting up your knitting machine for a seamless and efficient knitting experience.
To avoid any potential hiccups, it’s important to troubleshoot common knitting machine issues before getting started. Check that all the needles are in place and properly aligned, as any misalignment can cause dropped stitches or uneven tension. Additionally, make sure the carriage is moving smoothly along the bed without any resistance. If you encounter any problems, consult the user manual or online resources for troubleshooting tips specific to your machine model.
Next, adjust the tension on your knitting machine to ensure consistent and even stitches. Start by setting the tension dial at a medium level and knit a test swatch using scrap yarn. Examine the swatch closely – if it appears too loose or tight, make small adjustments until you achieve the desired tension.
By taking these steps to set up your knitting machine correctly, you’ll be well on your way to creating beautiful headbands with ease. Happy knitting!
Start Knitting the Headband
Now that you’ve got your knitting machine all set up, it’s time to start creating a stylish headband! You can easily whip up a cozy and trendy accessory in no time with your knitting machine.
To begin, make sure you’re familiar with basic knitting machine techniques. Set the tension and stitch size according to your desired headband width and fabric thickness. Once everything’s properly adjusted, load the yarn onto the machine and start knitting away.
Keep an eye out for any potential issues that may arise during the process. Common knitting machine issues include dropped stitches or tangled yarn. If you run into any problems, don’t worry! You can find troubleshooting tips in your knitting machine manual or online tutorials.
So grab some yarn and get ready to create a fabulous headband with your trusty knitting machine!
Finish and Style Your Headband
Enhance the overall look of your headband by adding personalized embellishments and experimenting with different finishing techniques.
There are numerous ways to accessorize your headband, allowing you to customize it to match your personal style. Consider attaching a decorative button or a fabric flower for an extra touch of charm. You could also try incorporating beads or sequins into your knitting for added sparkle and texture.
Additionally, exploring different knitting techniques can give your headband a unique and trendy look. Experiment with different stitch patterns such as cables, lace, or colorwork to create intricate designs that will make your headband stand out from the crowd.
Don’t be afraid to get creative and have fun with it – the possibilities are endless!
Frequently Asked Questions
How long does it typically take to knit a headband using a knitting machine?
Typically, it takes about an hour or two to knit a headband using a knitting machine. Knitting machine benefits include speed and efficiency, but cons include limited design options and less control over the final product.
Can I use different colors of yarn to create a striped pattern on the headband?
Yes, you can use different colors of yarn to create a striped pattern on your headband. By using various knitting machine techniques, you can achieve unique and stylish designs for your cozy and trendy headbands.
Are there any specific techniques or stitches I should know when using a knitting machine for headbands?
When using a knitting machine for headbands, there are specific techniques and stitches you should know. Familiarize yourself with the machine’s functions and learn basic stitches like knit, purl, and ribbing.
Can I adjust the size of the headband to fit different head sizes?
Yes, you can easily adjust the size of the headband to fit different head sizes. You can also use different yarn colors to create stylish stripes and personalize your headbands even more.
How do I properly clean and care for a knitted headband made with a knitting machine?
To properly clean and care for a knitted headband made with a knitting machine, gently hand wash it in cold water using mild detergent. Avoid twisting or wringing it. After drying flat, store it in a cool, dry place to prevent damage. To repair common issues like loose stitches, use a crochet hook and weave the yarn back into place.
Conclusion
So now you’ve completed your cozy and trendy knitting machine headband! You’ve chosen the perfect yarn and needles, found a stylish pattern, set up your knitting machine, and got to work. With each stitch, you’ve created something unique and beautiful.
And finally, after finishing and styling your headband, it’s ready to be worn with pride. Whether as a gift or for yourself, this headband is sure to keep you warm in style. Great job on your knitting journey!