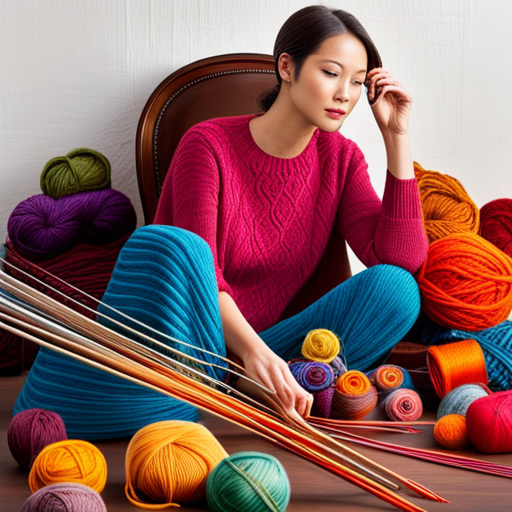
Are you a knitter who often finds themselves confused by the intricate patterns and instructions in knitting projects? Do you struggle to understand the terminology, charts, and stitch patterns that seem like a foreign language? If so, then this article is here to demystify those confusing elements of knitting and provide you with clear instructions for every project.
In this article, we will guide you through understanding knitting terminology, reading knitting charts, following stitch patterns, troubleshooting common mistakes, and give you tips and tricks for successful knitting. By breaking down each step in a clear and detailed manner, we aim to make even the most complex patterns accessible to every knitter.
Whether you’re a beginner or an experienced knitter looking to expand your skills, this article will be your go-to resource for unraveling the mysteries of knitting patterns. With our expert guidance and easy-to-follow instructions, you’ll soon be confidently tackling any pattern that comes your way.
So grab your needles and yarn, because it’s time to demystify those patterns once and for all!
Key Takeaways
- Knitting patterns can be confusing, but this article provides clear instructions to demystify them.
- Understanding knitting terminology is important, and a video tutorial is included to help with this.
- Different types of stitches, knitting charts, and colorwork charts can be used to create unique textures and designs in knitting projects.
- Troubleshooting common mistakes, choosing the right needles, and using blocking techniques can help improve knitting skills and the outcome of projects.
Understanding Knitting Terminology
If you’re a beginner knitter, understanding knitting terminology can sometimes feel like deciphering a secret code. But fear not! We’re here to demystify it for you.
Let’s start with common knitting abbreviations. These are shorthand symbols used in patterns to represent certain stitches or actions. For example, ‘k’ stands for knit and ‘p’ stands for purl. Knowing these abbreviations will make reading patterns a breeze.
Next, let’s talk about the different types of knitting stitches. There are so many beautiful stitch patterns to experiment with, from basic stockinette stitch to more intricate lace and cable stitches. Each stitch creates a unique texture and look, adding depth and interest to your projects.
By familiarizing yourself with common knitting abbreviations and exploring different types of stitches, you’ll be well on your way to becoming a confident knitter who can tackle any pattern that comes your way!
Reading Knitting Charts
Mastering the art of reading knitting charts will allow you to effortlessly navigate complex patterns with ease. Knitting charts are visual representations of a pattern, using symbols and colors to represent different stitches and techniques.
The ability to interpret cable symbols is crucial when reading knitting charts. Cable symbols indicate where and how to cross stitches over each other, creating intricate and beautiful designs. Understanding these symbols will enable you to create stunning cables in your knitted projects.
Incorporating colorwork into knitting charts adds another layer of complexity. Colorwork charts use different colors or symbols to represent different yarns or stitches. By following the chart’s instructions, you can create stunning patterns by working with multiple colors at once.
Reading knitting charts may seem intimidating at first, but with practice and patience, it becomes second nature. Soon, you’ll be able to tackle any pattern that comes your way, confidently deciphering the instructions through the power of knitting charts.
Following Stitch Patterns
Once you understand how to follow stitch patterns, knitting becomes a truly creative and enjoyable experience.
When it comes to following stitch patterns, it’s important to first differentiate between knit and purl stitches. Knit stitches are created by inserting the needle into the front of the stitch from left to right, while purl stitches are made by inserting the needle into the back of the stitch from right to left. By understanding this difference, you’ll be able to easily follow any pattern that includes these two basic stitches.
Furthermore, once you have mastered following stitch patterns, you can modify them to create custom designs. This allows you to add your own personal touch and create unique pieces that reflect your style. You can experiment with changing the order or repetition of stitches, adding different textures or even incorporating new stitch patterns altogether. The possibilities are endless!
Remember, practice makes perfect when it comes to following stitch patterns. Start with simple ones and gradually work your way up to more complex designs. With time and patience, you’ll become an expert at following any stitch pattern and will be able to create beautiful knitted items that showcase your creativity and skill.
Troubleshooting Common Mistakes
To troubleshoot common mistakes, you can identify the source of your error and correct it with practice and attention to detail.
Two common mistakes that knitters often encounter are dropping stitches and twisting stitches.
Fixing dropped stitches is relatively simple once you spot them. Use a crochet hook or a small knitting needle to pick up the dropped stitch from the row below, then carefully work it back up to the current row. It may take a few tries to get it right, but with patience, you’ll be able to fix it seamlessly.
Correcting twisted stitches requires careful observation. Take a close look at your knitting and make sure each stitch is properly oriented on the needle. If you notice any twisted stitches, simply slip them off the needle, untwist them in the correct direction, and put them back on the needle.
By being attentive and practicing these techniques, you can easily troubleshoot common mistakes in your knitting projects.
Tips and Tricks for Successful Knitting
Get ready to level up your knitting game with these helpful tips and tricks that’ll make you a pro in no time!
Choosing the right knitting needles is crucial for successful knitting. The size and material of the needles can greatly affect your project’s outcome. Consider the yarn weight and gauge to determine the appropriate needle size. If you’re working with slippery yarn, use wooden or bamboo needles to prevent stitches from sliding off. For extra grip, try using needles with textured surfaces or rubberized tips.
Once you’ve completed your project, don’t forget about blocking techniques for perfect finishing. Blocking helps even out stitches, smooth fabric, and give it a polished look. Wet blocking involves soaking your knitted piece in lukewarm water, gently squeezing out excess moisture, then shaping it to its desired dimensions while pinning it down. Steam blocking is another option where you hover a steam iron over the piece without touching it directly.
By following these tips and tricks for choosing the right knitting needles and utilizing blocking techniques, you’ll be well on your way to becoming a skilled knitter!
Frequently Asked Questions
What are the best types of knitting needles for beginners?
The best types of knitting needles for beginners are bamboo or wooden needles. They are lightweight, easy to hold, and provide a good grip on the yarn. These needles also have a slightly more flexible feel, making them less likely to slip out of stitches.
How do I join a new ball of yarn in the middle of my knitting project?
To join a new ball of yarn seamlessly in the middle of your knitting project, first, leave a long tail from the old yarn. Then, insert the needle into the next stitch with both tails and knit as usual. Troubleshooting common mistakes is important for a smooth finish.
Can I use circular knitting needles for flat knitting projects?
Yes, you can use circular knitting needles for flat knitting projects. They are great for seamless knitting because you can easily knit back and forth without having to turn your work. However, if you prefer alternatives, you can use straight needles or double-pointed needles.
How do I fix a dropped stitch without unraveling my entire work?
To fix a dropped stitch without unraveling your work, use a crochet hook or knitting needle to catch the dropped stitch and pull it through. Avoid common mistakes in knitting by being careful and attentive when working on your project.
What is the best way to block my finished knitted project?
To block your finished knitted project, start by choosing the right blocking tools and materials. For lace projects, use blocking wires or pins to stretch and shape the pattern. For cables, gently steam or wet block to even out stitches.
Conclusion
In conclusion, this article aims to empower every knitter with the knowledge they need to successfully tackle any project by demystifying the patterns and providing clear instructions. Understanding knitting terminology is essential for comprehending instructions accurately.
Reading knitting charts allows for a visual representation of stitch patterns, making it easier to follow along. Troubleshooting common mistakes ensures that errors are corrected promptly, preventing frustration and wasted time.
Finally, the tips and tricks shared in this article will help knitters become more skilled and confident in their craft. Happy knitting!